How to Edit Zoom Call Recordings (with Automatic Captions)

With almost everyone having the possibility to work from home, Zoom has surpassed 300 million daily users globally. You might be recording video calls with your customers, your team, or your family and friends. In this tutorial, we’ll cover everything you need to edit your Zoom video call recording on Typito.
Before we get to the video editing bit, here's a couple of things that could help you make your zoom video experience better. A couple of tips and tricks never hurt anyone!
1. React with emoji on screen
If you're muted in a meeting, you can still let the hosts know your thoughts with emoji reactions. Send a thumbs up or a clapping emoji to communicate without interrupting the meeting
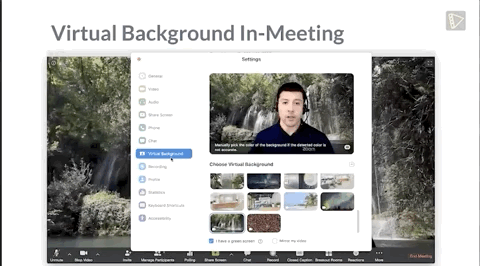
2. Use Zoom virtual backgrounds
If you want to make things fun or just want to hide the mess behind you from the room you haven't cleaned all week - then there's good news. Zoom offers virtual backgrounds. These are backdrops for your calls that include things like space, cityscapes, and ocean-side views too.
Once you have an engaging Zoom video recording ready, let's learn how to edit your Zoom video recording on Typito, step by step.
Typito is an online web-based drag-and-drop tool that creates engaging videos with beautiful typography, images, and brand layouts. It is like Canva but for videos!
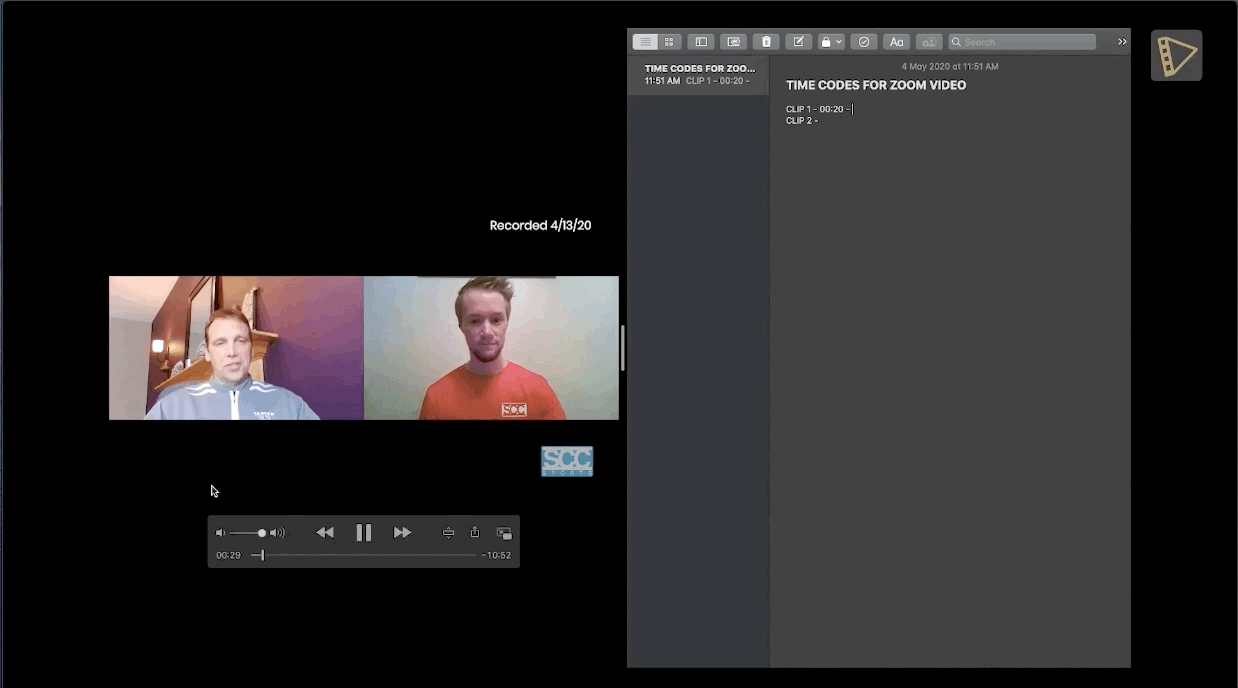
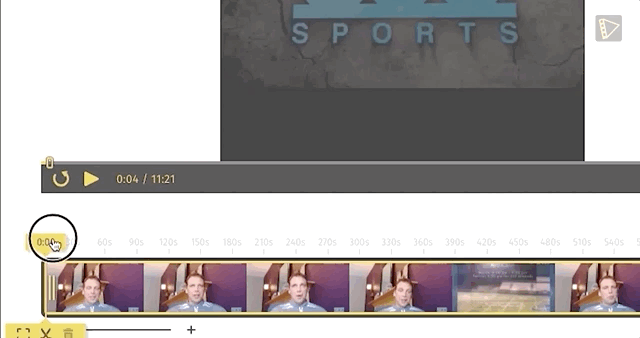
Step 1: Watch the video you just recorded
Note down the specific time codes you want to cut the video at. This makes the editing process smoother.
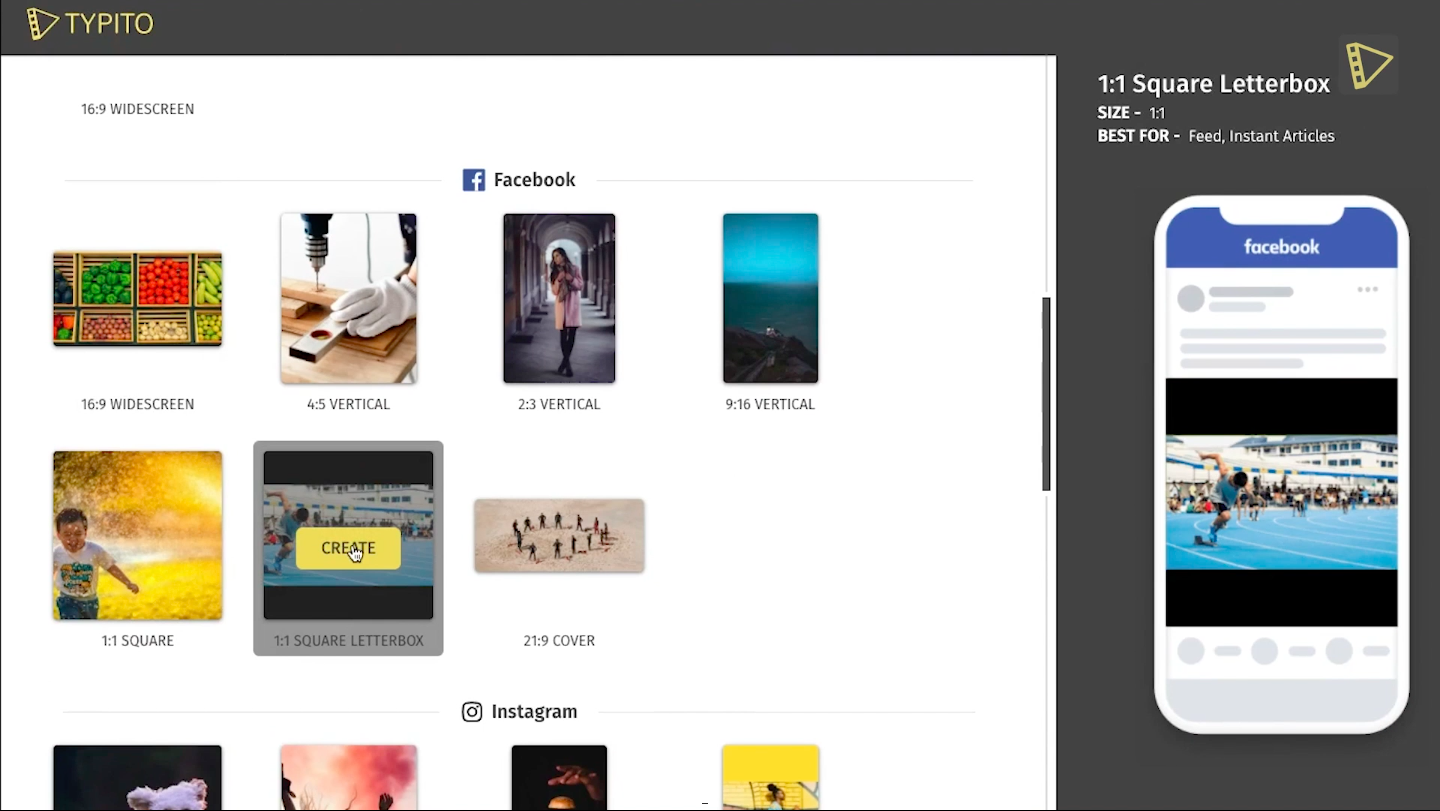
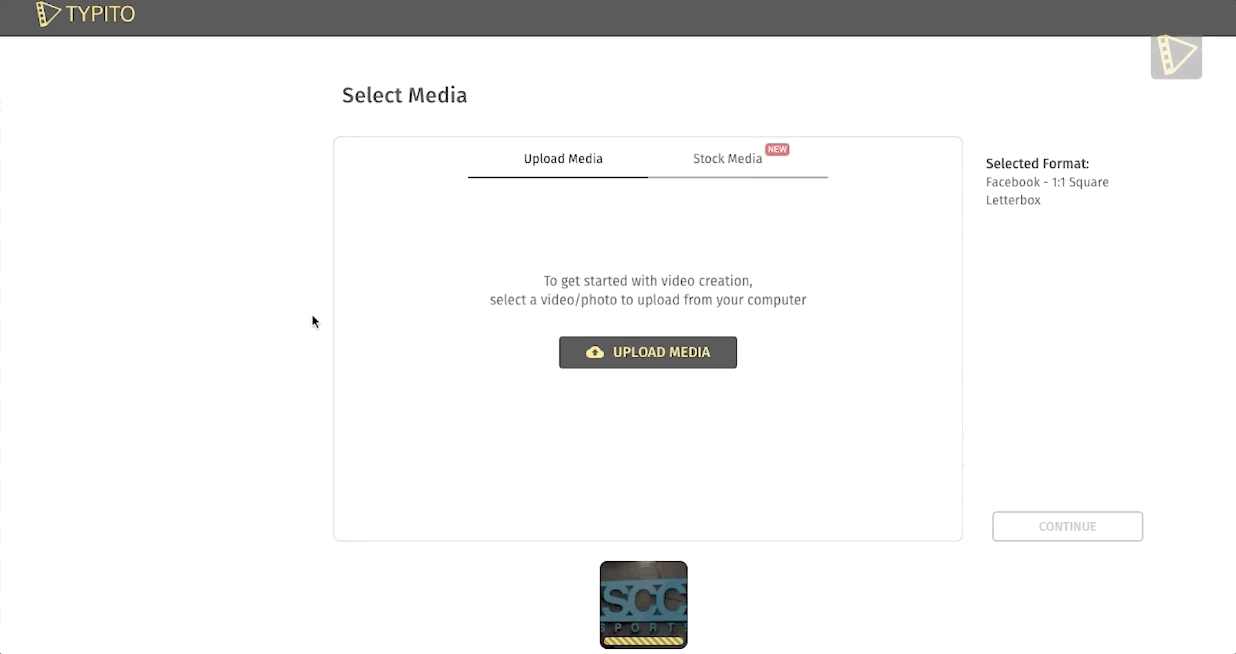
Step 2: Choosing video Format
Open a new project on Typito. And then select a format you want to work. Getting the aspect ratio right is an important detail to make great videos. Here we choose a square letterbox. This format gives us enough space to add elements such as titles and captions onto the video.
Step 3: Upload video onto Typito
Step 4: Edit your video
Now that we have our video, we then edit the parts we don't require according to the timecodes we took down previously. Now we have shortened the video to 30 seconds as compared to our 11-minute video.
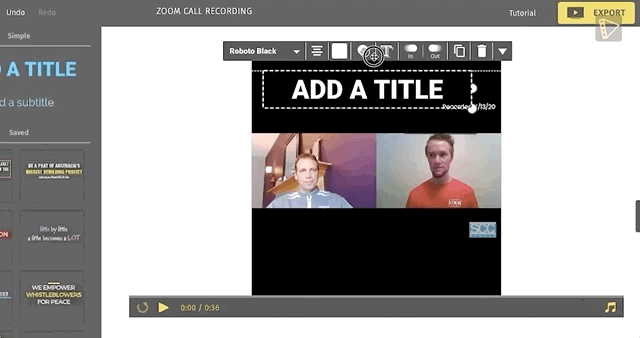
Step 5: Adding a Title
Let's move on to adding a title to our video - This will help our viewers know what is in store for them before they start to watch the video. And it also helps to summarize what our entire video is about.
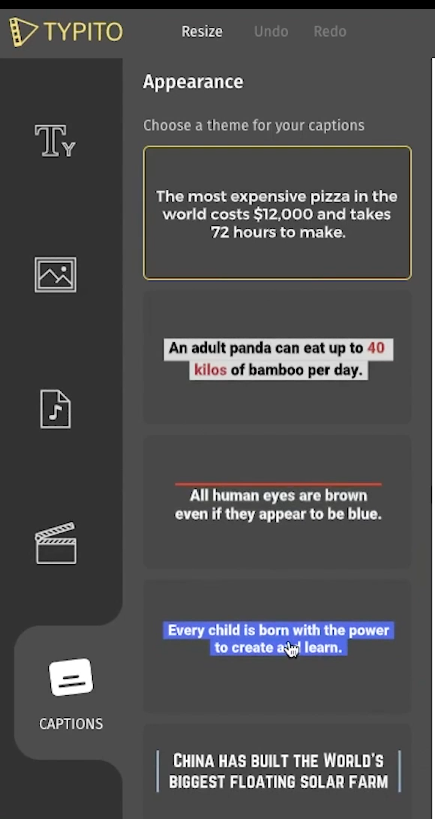
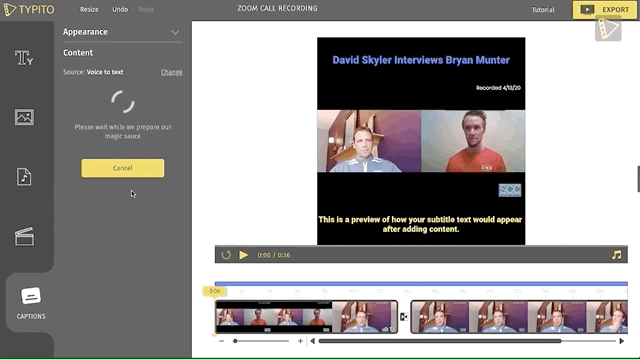
Step 6: Adding subtitles using Voice to Text
Now for the fun part. Subtitles boost viewers' engagement. And when it's this easy we have no excuse not to add them. Go to the captions menu on the bottom left and choose and choose how you want your captions to appear. This highlighted captions fit the video best.
Before we get that started we customize the color of the font to yellow and then click on "Voice to text" and followed by "Auto-generate".
And done. Give it a quick preview. The only thing left for us to do is export our file. Our video is now ready for distribution to your various social media platforms.
Liked the tutorial on how to edit a Zoom call recording? We also created a quick video that covers all the key steps. Check it out and tell us what you like.
So what are you waiting for? Try out Typito the next time you need to edit your Zoom call recordings. Sign up here.


![Best YouTube Outro Templates [Tips + Inspiration]](/blog/content/images/size/w750/2022/11/Blog-Articles---Featured-Images-Illos--23-.png)
![15 Best Facebook Video Downloaders that Do the Job in Minutes [2022 Rankings]](/blog/content/images/size/w750/2022/11/Blog-Articles---Featured-Images-Illos--21-.png)